Last summer I finally decided that it was time to buy a new computer. As it has been almost 10 years that I had switched to laptops, I completely forgot the whole excitement of searching for parts, checking compatibility issues, studying performance reports from various sites, etc. And the technology changed since my last build: watercooling AIO-s, sound dampening materials in computer cases, modular PSU-s, case modding, etc. It took almost two months to browse the available components and to try to order the ones that were not so available. I ended with the following build:
- Intel® Core™ i7-4790K Processor
- Fractal Desing Kelvin S36
- MSI Z97 GAMING 5 Motherboard
- Kingston HyperX Beast DDR3 Memory 4 x 8GiB 2400MHz CL11
- MSI GeForce GTX 970 GAMING 4G
- Samsung 850 PRO SSD 256GB
- Seagate ST2000DM001 2TB HDD
- Super Flower Golden Green HX 80Plus Gold 650W PSU
- Fractal Design Define R5 Black Case
Before I started picking those components I set up a budget limit. I usually do that to stop myself from spending on stuff that I don’t need. Needles to say, I blew the budget big time. There were two reasons for that, the firs being able to buy the components at about 20% discount. So, instead of saving a bit of money I decided to use this 20% buffer to buy some better components. And after that you get to reason two: rationalising marginal price differences for some better components. So I took the 4790K because it was the the best processor that I could buy and it was overclockable (I always wanted to do that, so why miss the fun), and the S36 is for cooling it. The excess RAM was for the numerous virtual machines I had to run simulating production environments. The R5 has sound dampening because the case usually sits very near, just near the monitor. The SSD for booting fast, HDD for mass storage. And last, the most expensive part, the 970, which I actually don’t need for work, I bought because it was time to star playing the million of games I have bought on HumbleBundle and Steam.
So I put the components together, added some disks from my old backup server (which is now a virtual machine I run on this one, but with direct physical access to the original disks), and here I am.
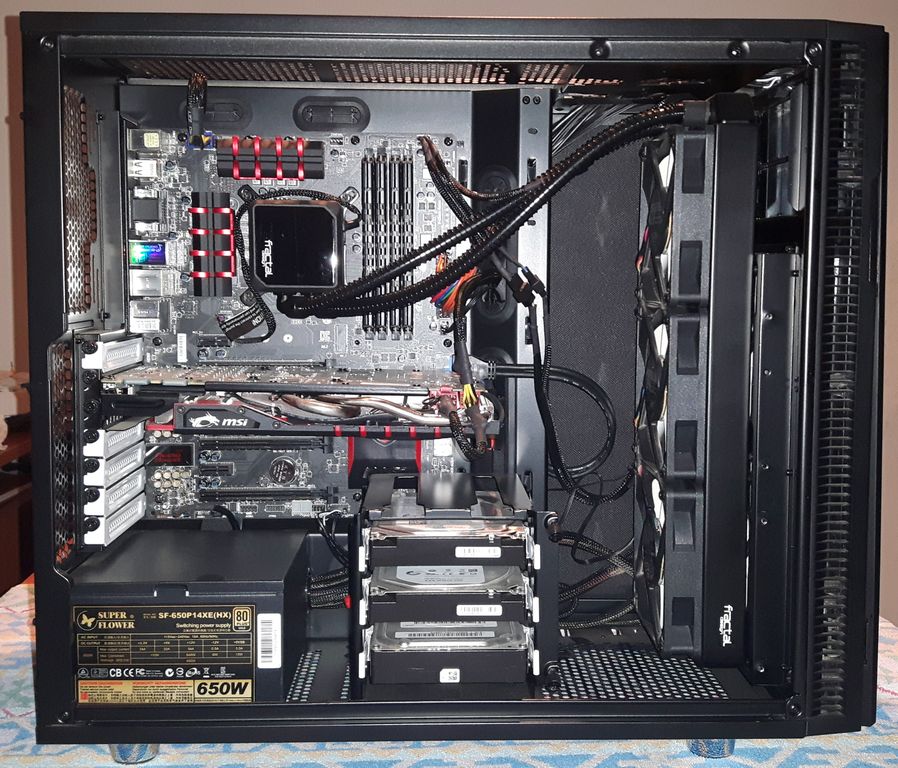
Original component location
This is the original configuration I had in mind when I was buying the components.
I decided to put the S36 in front, the small cage in the middle, because there was no place in front. This design showed some problems that are shown in the next picture.
Design problems
The problems that I noticed after completing the build.
- Yellow: The CPU cooler pump is rotated 90° CW because the fittings on the pump can’t fit if you have the a RAM in the first RAM slot. I tried to fit it like that, but ended up scratching the RAM heatsink a bit.
- Red: The top of of the radiator does’t get fresh air, because the intake size is 2 x 140mm which is less than the 360mm. Also, the tubes are stretched almost completely. They wouldn’t be if the fittings on the pump were on the right.
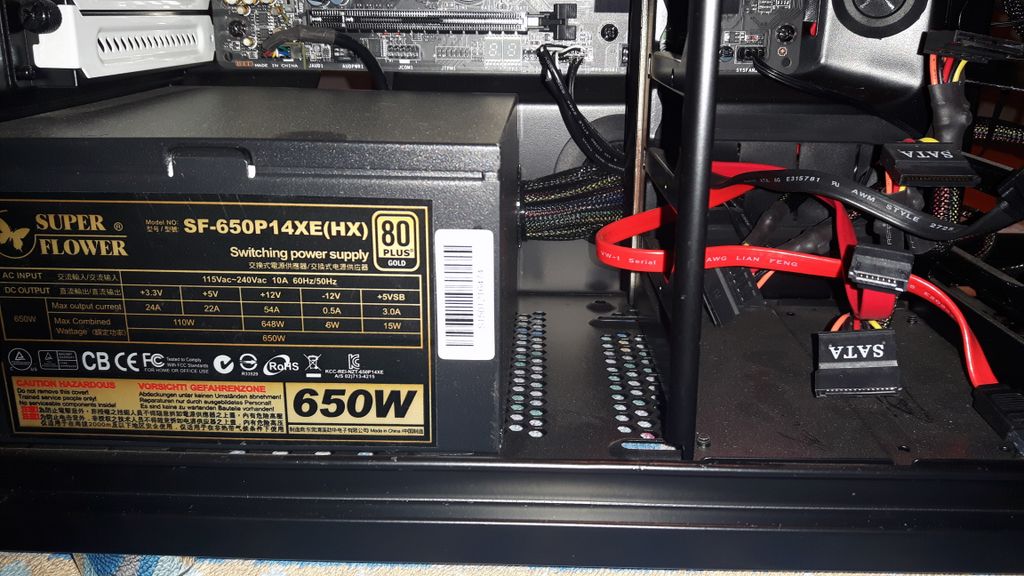
Cage problems
The problems when the smaller HDD cage is placed in the middle location. The SATA power and data cabled do not fit well in this confined space.
- Green: The cage barely fits in the middle position. I was planing to put the bigger cage there, but it collided with the graphic card. Trying to shift it closer to the radiator was not a good solution because it would hang on only two screws. Also the cabling for the HDDs there was a bit complicated. The SATA data connectors would keep falling out when I tried to open the tray just a few cm. I had to use the data cables with metal springs to fix that.
PSU cables problems
The cabled barely bend enough to fit behind the cage and into the rubber grommets.
- Blue: The power cables barely bend enough and are compressed by the cage in the middle position. This actually depends on the type of PSU you have, but the ATX power cable was the biggest and least flexible of them all so I assume similar problems could occur even with a modular PSU.
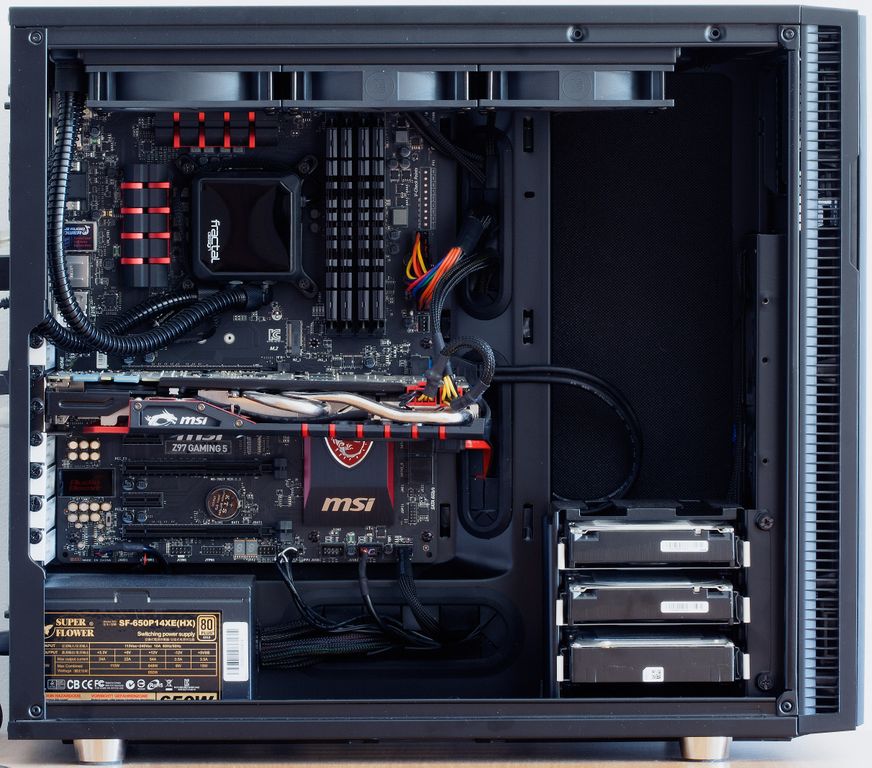
After changing the location of the radiator to the top of the case, the small HDD cage could now be placed in its original position. I have also changed the default Kelvin S36 fans with 3 EK-Vardar F4-120ER (2200rmp). When the settings are on minimum they spin at about 300rpm which is almost completely silent. Actually, you can hear just a very quiet mechanical buzz on the exhaust side, but only if you are within 10cm of the fan. The resulting configuration is shown in the last picture.
Final component configuration
The radiator is on the top of the case, and the smaller HDD cage is in its original position. This is the only picture taken with a real camera :(
After some testing the new position of the radiator in combination with the new fans yielded a 2°C lower temperature on full load with Prime95v285. Another thing that I noticed is that core 1 in any considerable load is cca 10°C hotter than the other cores. After reading a couple of OC tutorials it seems that the thermal paste was not applied correctly. So, I have something to write about for next time.
